- REVIEWS
Product Category Product Category 
Brands Brands - VIDEOS
- CARP SCENE
- WIN
Anatomy Of A Carp Rig | Younes Gonzalez' Pre-Prick Rig

Like many anglers, I’ve been enticed by the technical aspects of carp fishing, including rig mechanics. For me, the prep leading up to the session is as much a part of the excitement as the actual fishing itself. I’ve spent hours playing with various rigs for different situations and have settled on this particular presentation for much of my fishing.
It involves a stiff boom section with a counterweight at the end (often a small barrel lead, up to 10g!), and a short, braided hook section. The key here is using a balanced setup; It’s important to use a boom material that is stiff enough to push out straight under the pressure of the counterweight.
The larger the hook bait you use, the bigger the counterweight you can get away with, and the stiffer the boom needs to be.
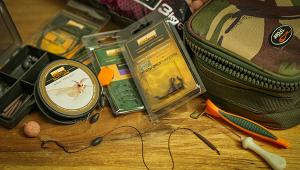
When fishing for large carp in snaggy Continental waters I will often use very large baits, a 10g counterweight and a boom constructed of 80lb mono! For a more subtle presentation you can swap this for a much smaller counterweight and a stiff fluorocarbon or the RM-Tec stiff coated braid.

This rig is particularly suitable for catching big fish that feed very statically, such as suspicious fish or winter carp. This is because the rig acts much like a super-short rig, which results in the hook point penetrating the carp’s bottom lip as soon as it comes into tension with the counterweight on the boom. This then makes it more difficult for the fish to eject the hook when it tries to spit out the bait. The rig then has the added advantage of being a longer rig, meaning you’re less likely to lose fish due to a short hook link.
The main disadvantage is the rig is not overly aerodynamic, so it’s most suited to situations where you can lay the rig in place, either by wading out or placing from a boat. It is essential when casting from the bank to use a PVA bag hooked in place to ensure the rig settles gently.
Step-By-Step: Tying Younes Gonzalez' Pre-Prick Rig
 1. Start by threading a crimp on to some thick, stiff mono. A mono shockleader material is ideal.
 2. Next, slide on a match-style olivette. Younes typically uses a 6g weight here, but up to 10g with stiffer booms.
 3. Follow this with a size 8 RM-Tec swivel.
 4. Pass the mono bac through each of the items and carefully blob the end using a lighter.
 5. Pull the components into place as shown, leaving a small loop at the swivel end.
 6. Squeeze down the crimp using the crimping tool.
 7. Use the spike on the RidgeMoney multi tool to open the small loop for added movement.
 8. Thread an anti-tangle sleeve on to the stiff boom.
 9. Crimp a small loop in the end of the boom to clip to a QC swivel. Alternatively crimp a loop directly to the swivel.
 10. Tie a small hair loop in the end of some braided hook link. Use the braided shockleader for snaggier venues.
 11. Mount your desired hook bait to determine your hair length.
 12. Add a small rubber stopper, then mount a rig ring on the hair.
 13. Mount the ring on the bend of a beaked point hook, then secure with a knotless knot.
 14. Add a short length of shrink tube and carefully shrink into place with steam or carefully heat with a lighter.
 15. Tie a loop in the other end to form a short braided hook section - roughly two to three inches is ideal.
 16. These hook sections can then be looped in place on the swivel of the hook section.
- Log in or register to post comments


| Gear Reviews | More Gear Reviews | News Articles | Venues Videos | Shop | Subscriptions | Resources |